PiPiece
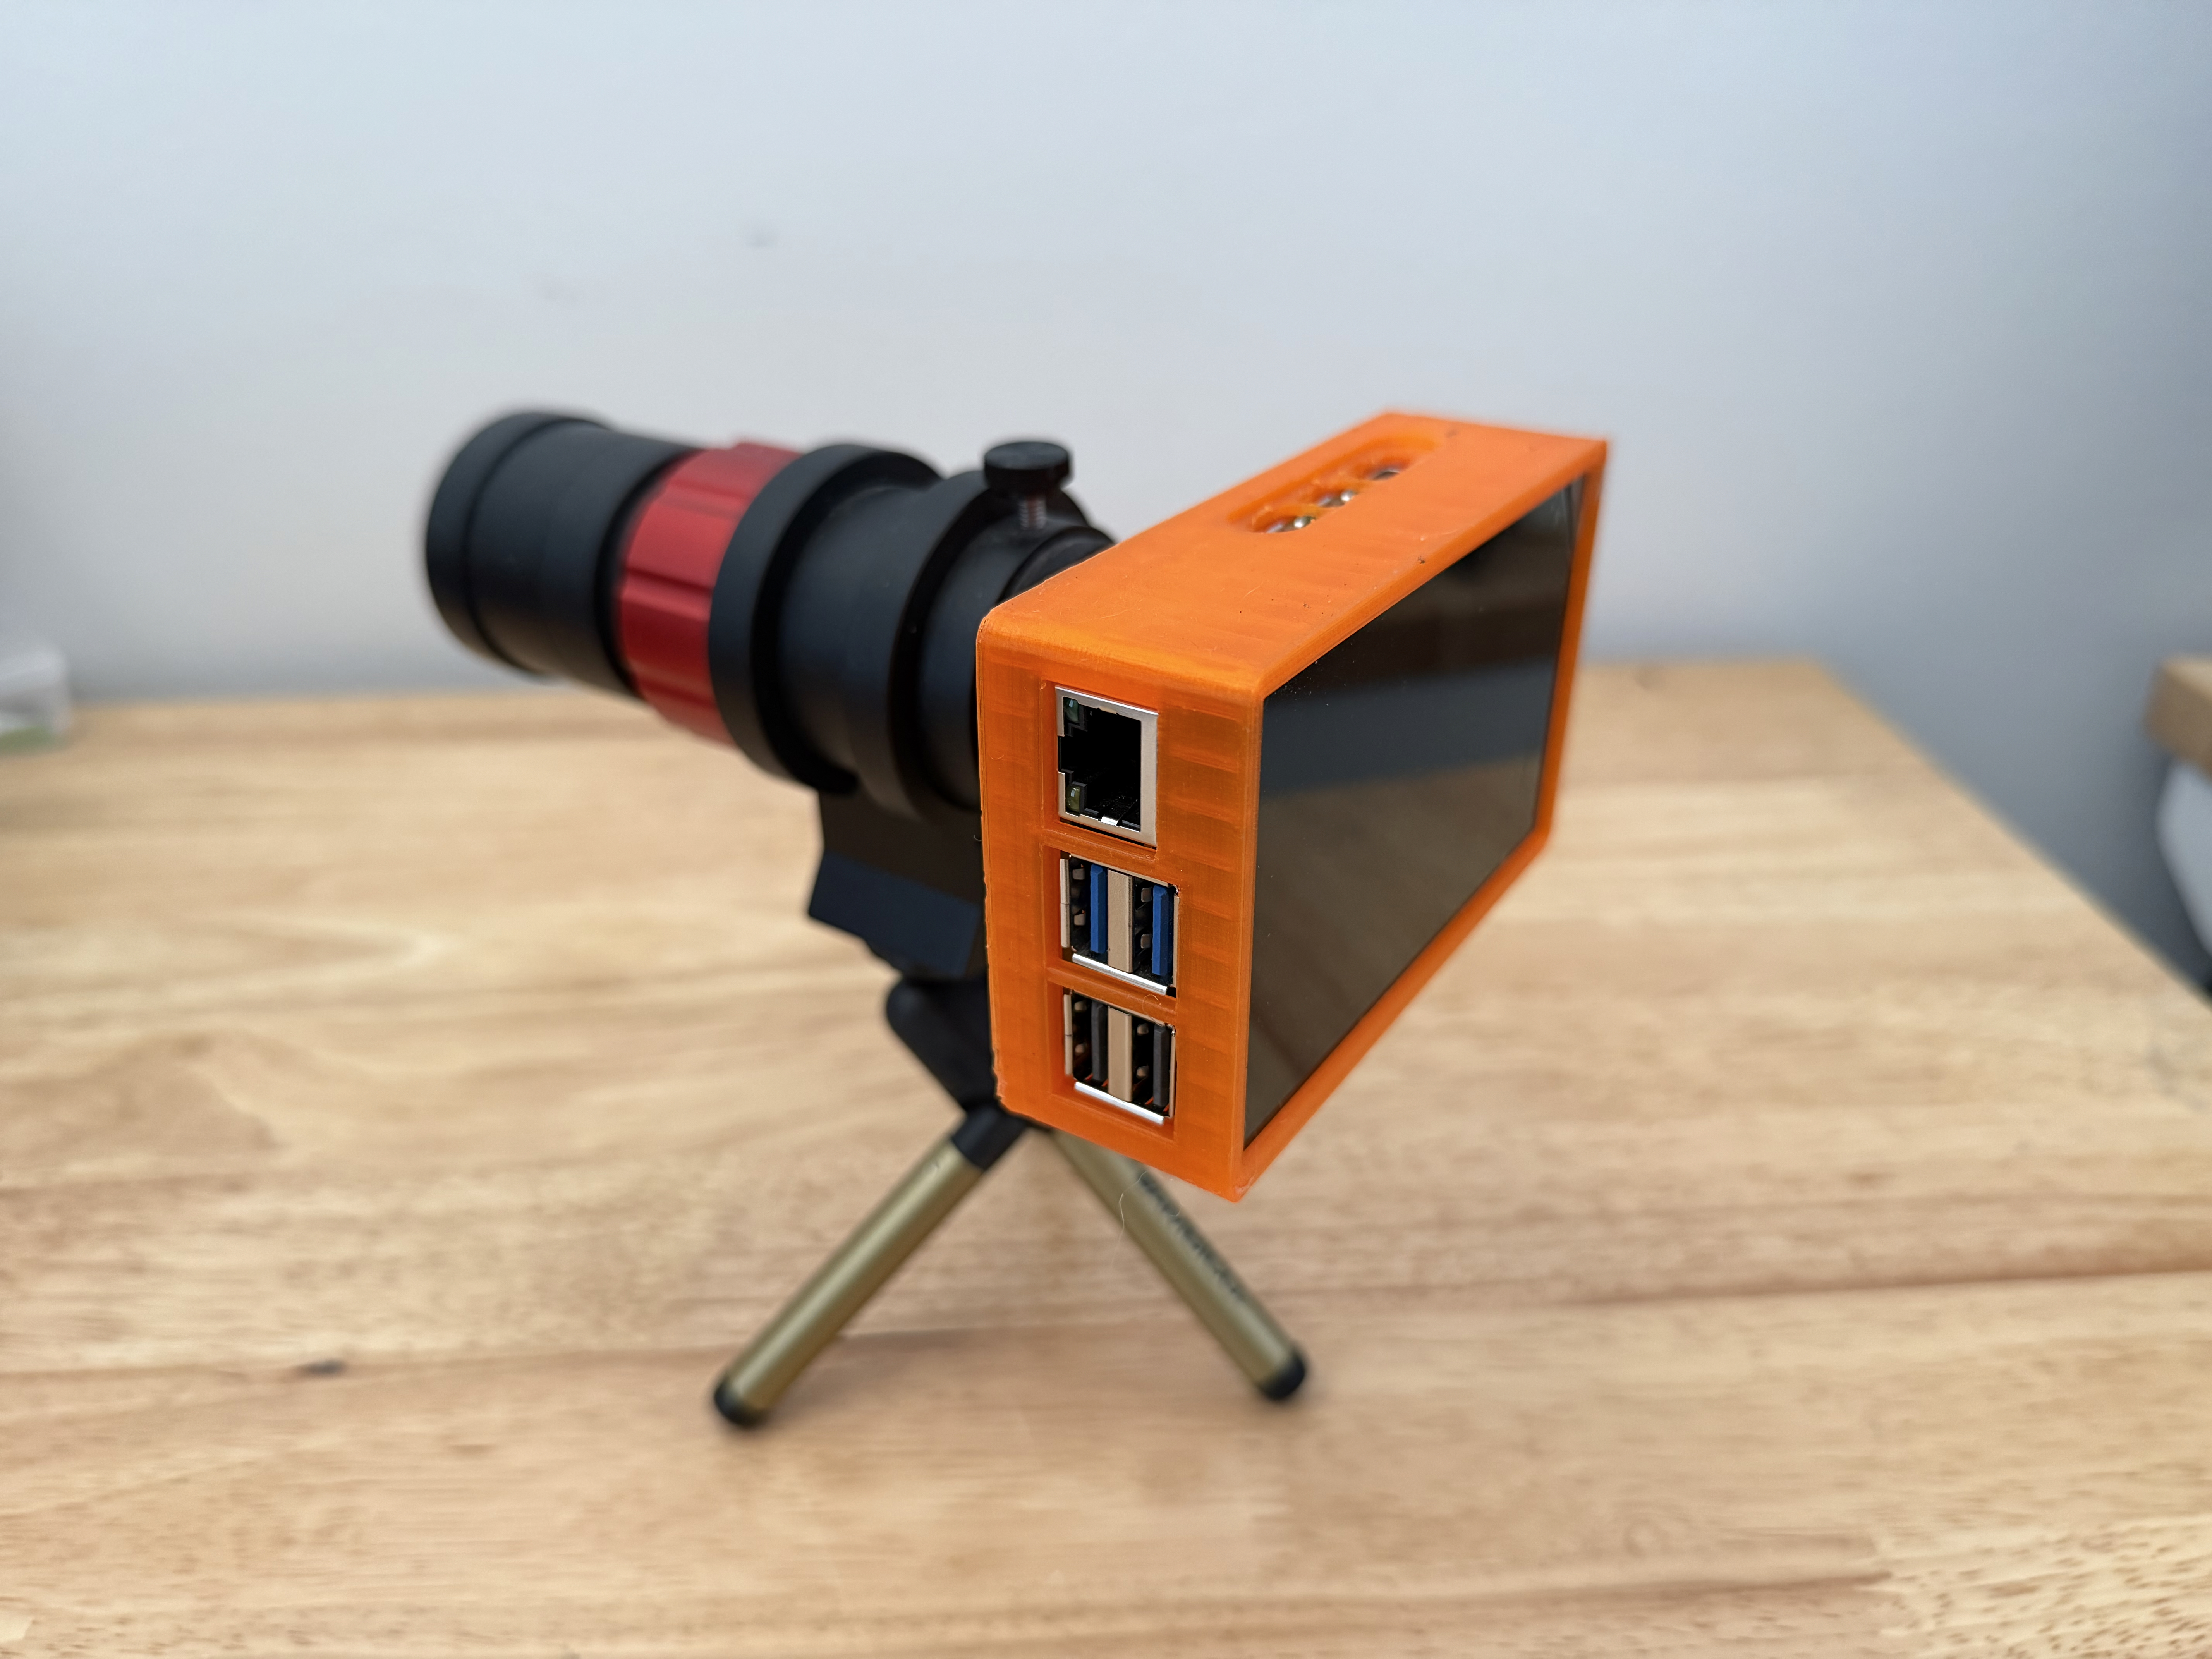

A custom Raspberry Pi 5 case designed for astrophotography! Works perfectly with the HQ Camera V3 and HyperPixel 4.0 Screen.
Quick Navigation
- Printing Your Parts
- Assembly Guide
- Development Setup
- Building Documentation
- Using Libraries
- Sharing Your Design
UI & Software
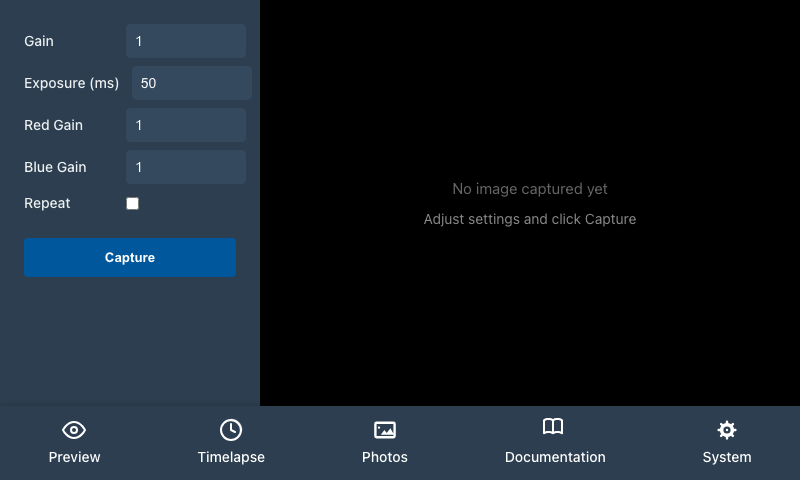
For the web-based interface and software controls for PiPiece, check out the PiPiece UI project. It provides a user-friendly dashboard for controlling and monitoring your astrophotography setup on the Raspberry Pi.
Getting Your Parts Ready to Print
Check out the interactive OpenJsCad viewer below to explore the 3D model! When you're ready to print:
- Uncheck all the parts you don't want to print
- Set the resolution to Ultra High to get a smooth part
- Select your export format (STL is what most people use)
- Click generate (it's best to generate an STL file for each part individually)
- Import the file into your favorite slicer and start printing!
Tip: I highly recommend printing with PETG instead of PLA. The Pi 5 runs pretty warm, and PLA can get soft and deform over time. PETG handles the heat much better!
What to print: You'll need three parts total:
cameraCaseTopcameraCaseBottompicase
⚡ Quick Download Links
Download the STL files directly:
Assembly Guide
Welcome to your PiPiece build! 🎉 Once you've got your 3D printed parts ready (the main case, camera-case-top, and camera-case-bottom), you're ready to start putting everything together. Don't worry—we'll walk through it step by step!
What You'll Need - Parts
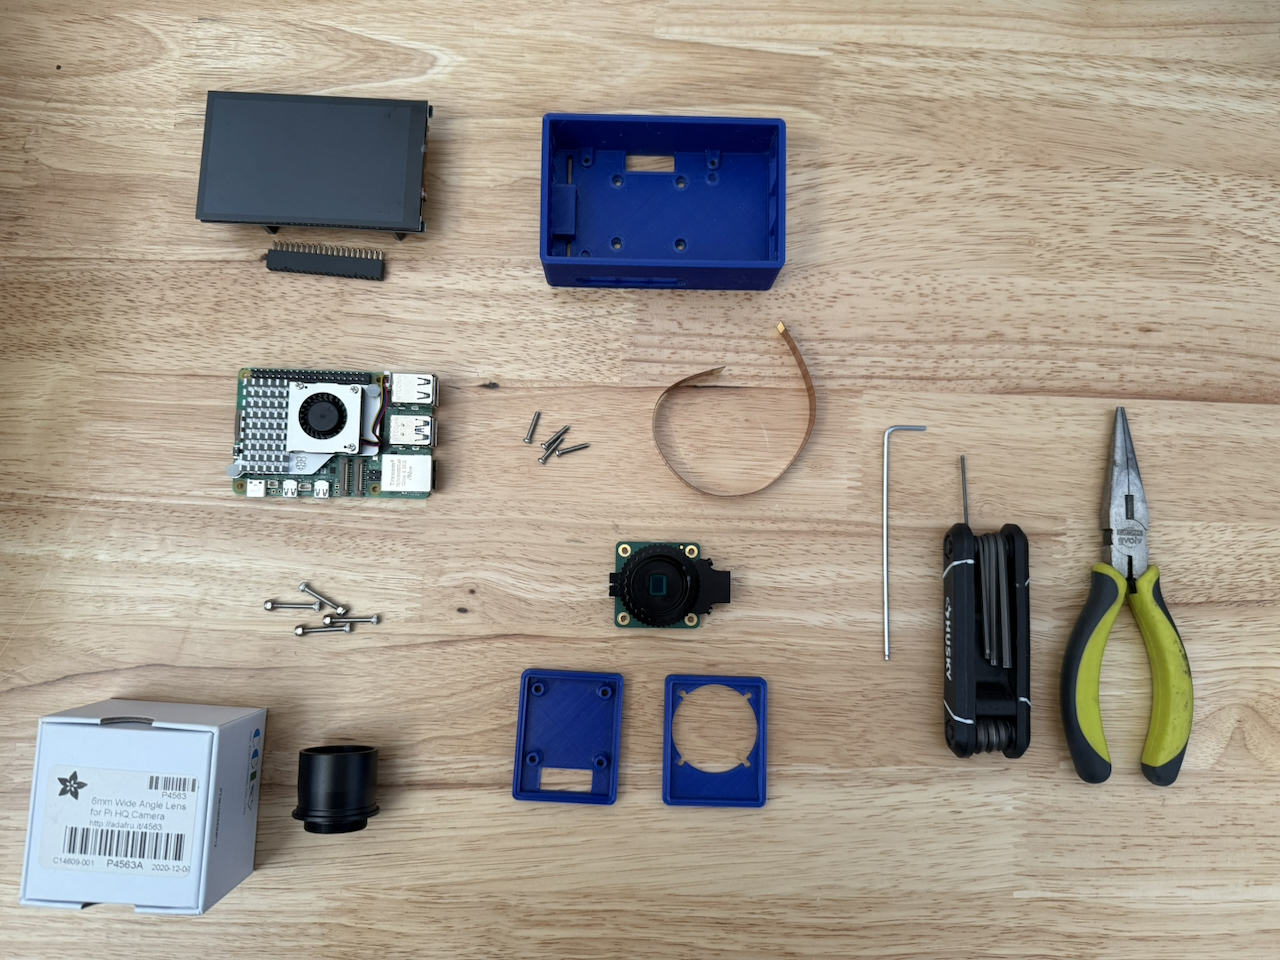
Here's your shopping list:
Note: The links below go to Adafruit and Amazon for convenience, but you can source these parts from any retailer you prefer!
- Raspberry Pi 5
- Official Raspberry Pi 5 Active Cooler
- Raspberry Pi High Quality HQ Camera - 12MP
- Pimoroni HyperPixel - 4.0" Hi-Res Display for Raspberry Pi
- (4) m2.5 20mm socket head screws with locking nuts
- (4) m2.5 15mm screws (heads up: the screws that come with the HyperPixel are too short, so you'll need replacements)
Plus, you'll want one of these lenses:
- 6mm 3MP Wide Angle Lens for Raspberry Pi HQ Camera - 3MP - great for wide field views!
or
- C Mount to 1.25" eyepiece adapter - perfect if you're connecting to a telescope!
What You'll Need - Tools
Grab these tools before you start:
- 1.5mm hex wrench (for removing the tripod mount from the HQ Camera)
- 2mm hex wrench (for the M2.5 socket head screws)
- Phillips screwdriver
- Needle nose pliers
- Painters tape (about 2 inches worth—this helps keep the ribbon cable in place)
Step 1: Remove the Tripod Mount
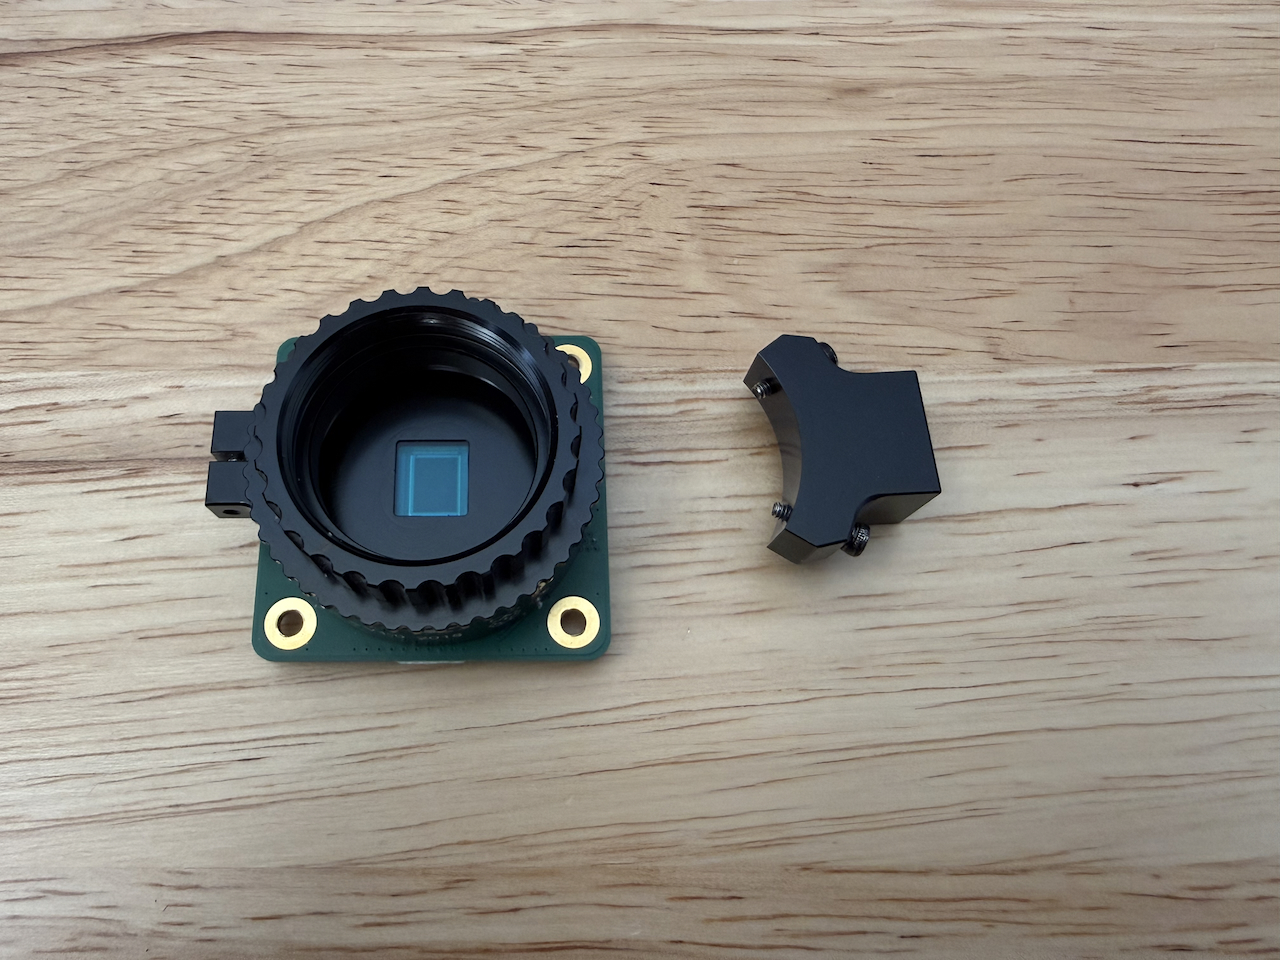
First things first! Use your 1.5mm hex wrench to remove the 1/4-20 tripod mount from the Raspberry Pi HQ Camera. We'll be putting this back on in a different orientation in the next step.
Step 2: Case Up the Camera
Now slide the camera case over your camera, then connect the ribbon cable. Here's the trick: when you re-attach that 1/4-20 tripod mount, make sure the flush part is positioned next to the camera case. This ensures everything fits snugly!
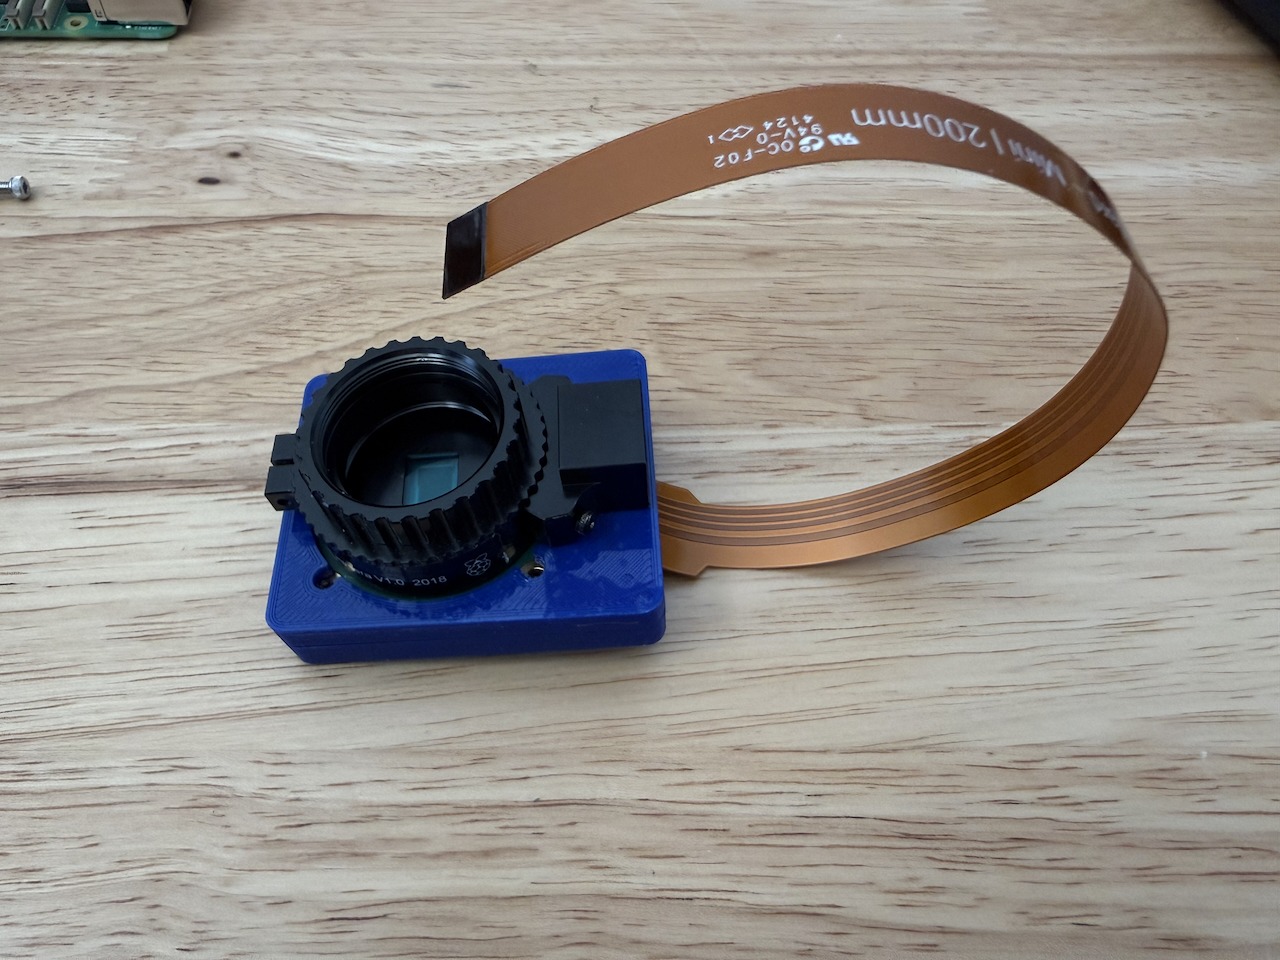
Step 3: Mount the Camera Assembly
Time to mount your camera assembly to the main case! Use those m2.5 20mm socket head screws and locking nuts. Tip: Make sure the ribbon cable threads through the rectangular hole in the case—it's designed specifically for this.
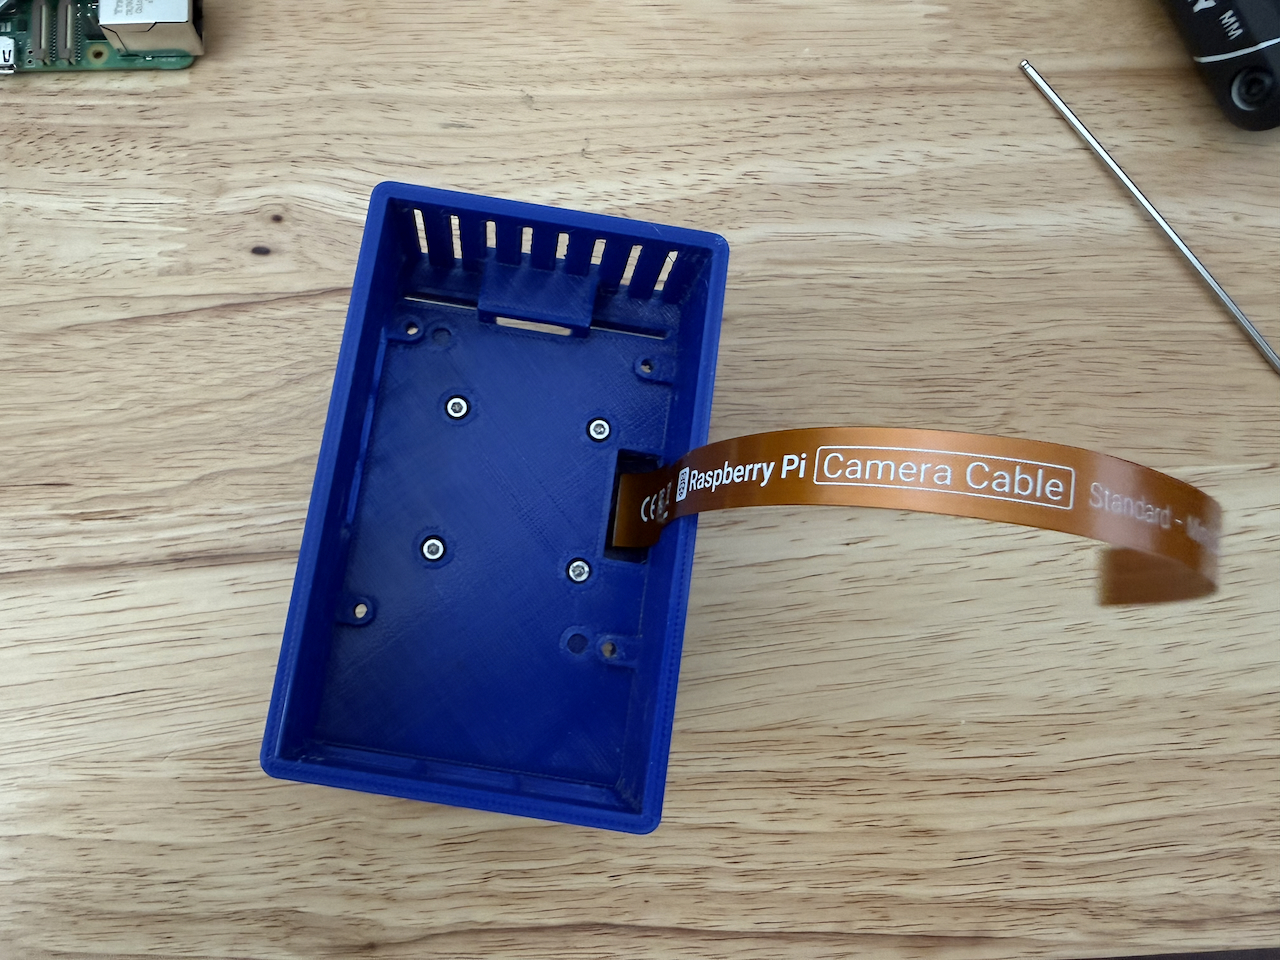
Step 4: Connect the Raspberry Pi
Carefully attach the ribbon cable to your Raspberry Pi, making sure the network and USB ports line up properly with the case openings. Then add the HyperPixel GPIO header extension onto the Pi. You're doing great—we're halfway there!
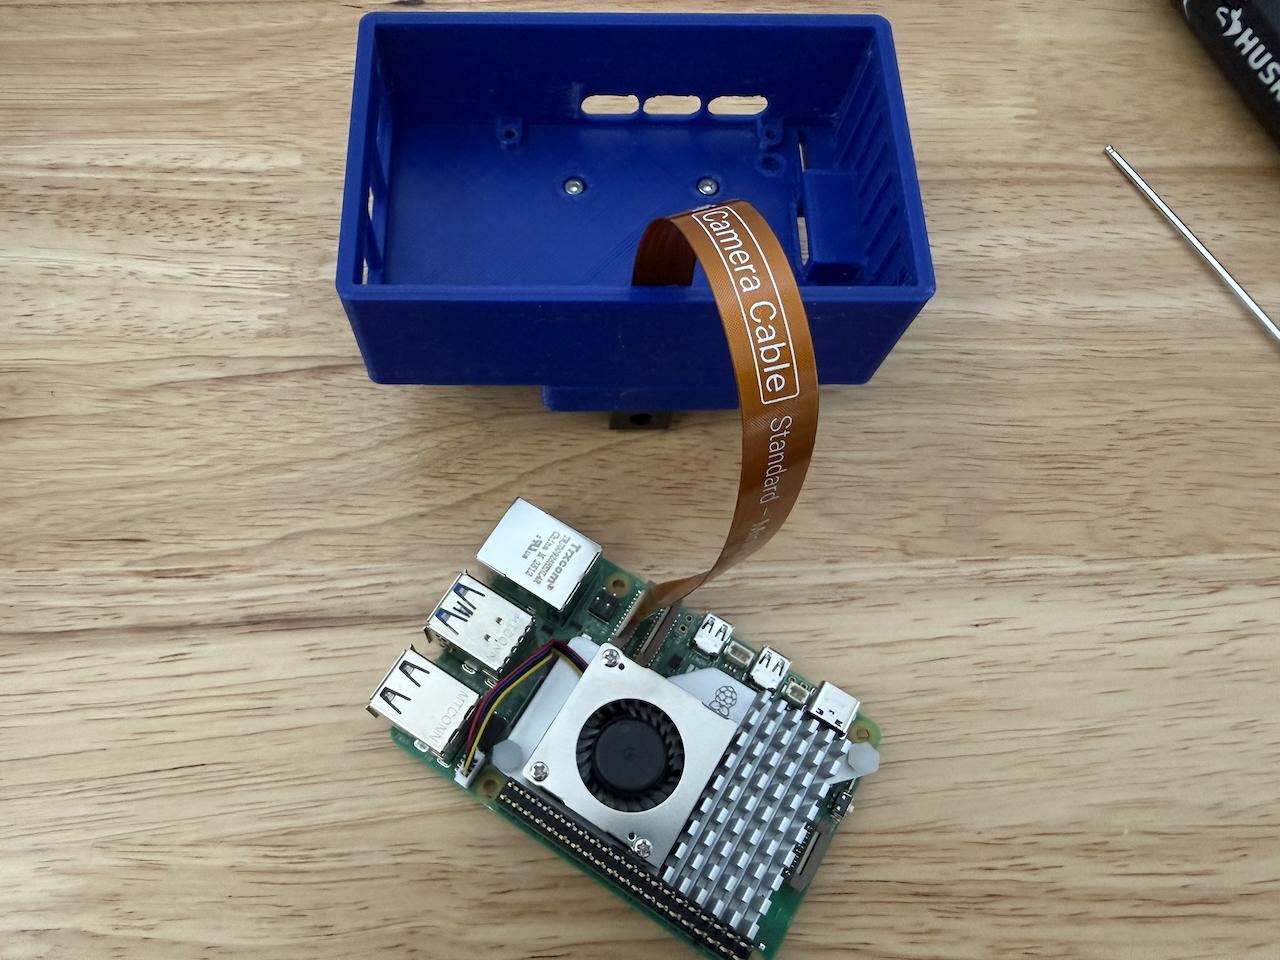
Step 5: Secure That Cable!
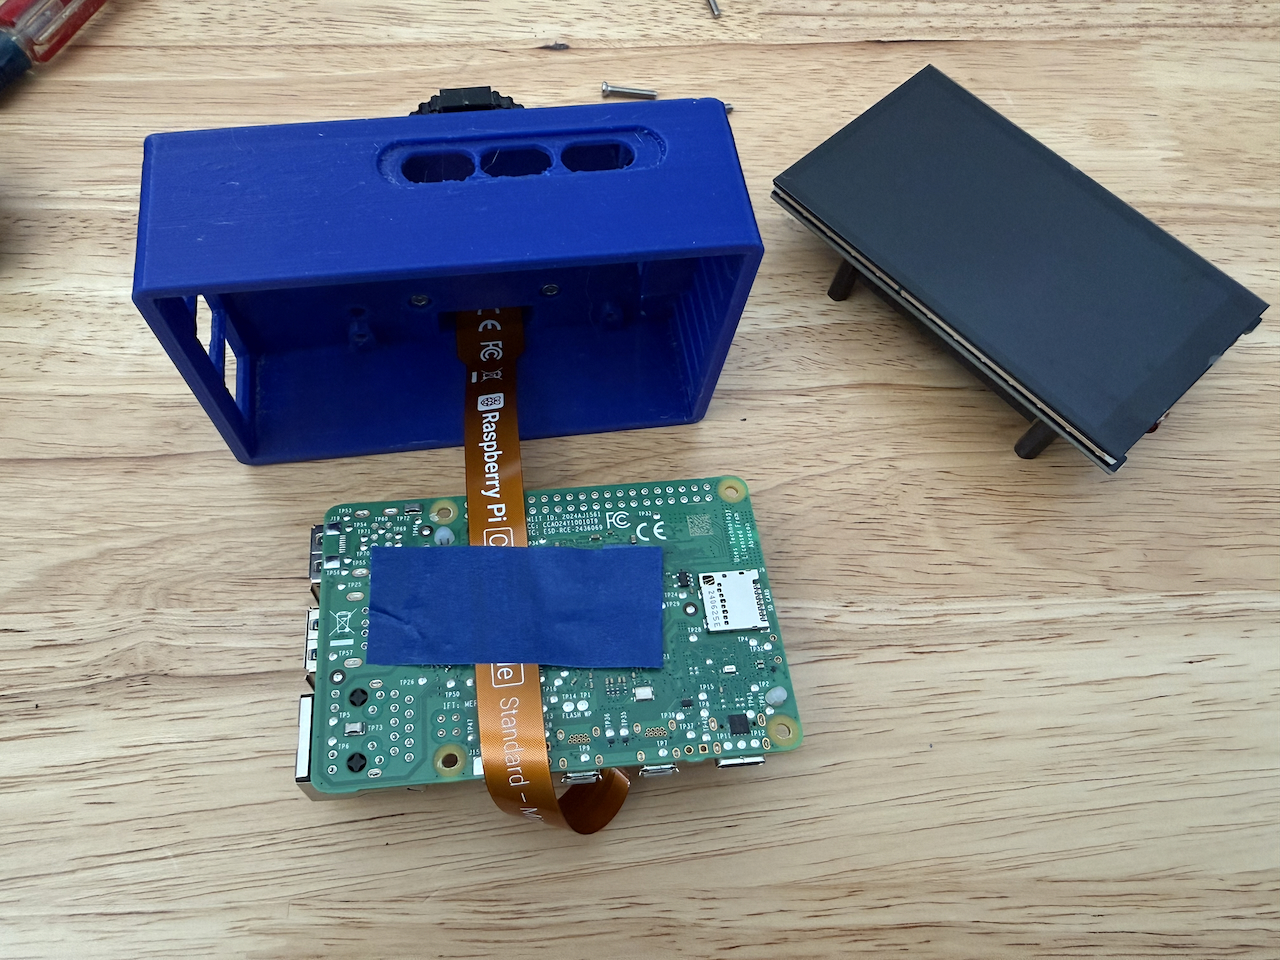
Here's where that painters tape comes in handy! Carefully tape the ribbon cable to the underside of the Raspberry Pi. A couple of important things to watch out for:
- Don't cover the mounting holes on the Pi
- Keep the second micro HDMI port clear
- There's a helpful little rib molded into the case that helps guide the ribbon cable away from the HDMI port—use it!
Painters tape works great here because it won't leave residue, but any gentle tape will do.
Step 6: The Final Assembly (Take Your Time!)
This is the trickiest part, so let's go slow. Attach the HyperPixel 4 screen, then carefully lower the entire assembly into the case. The fit is pretty snug, so here's the technique:
- Use the USB and network ports as guides to help maneuver the board into position
- Important: DO NOT press directly on the screen or force anything!
- Let the m2.5 15mm screws do the work—gently tighten them to draw the case and screen together
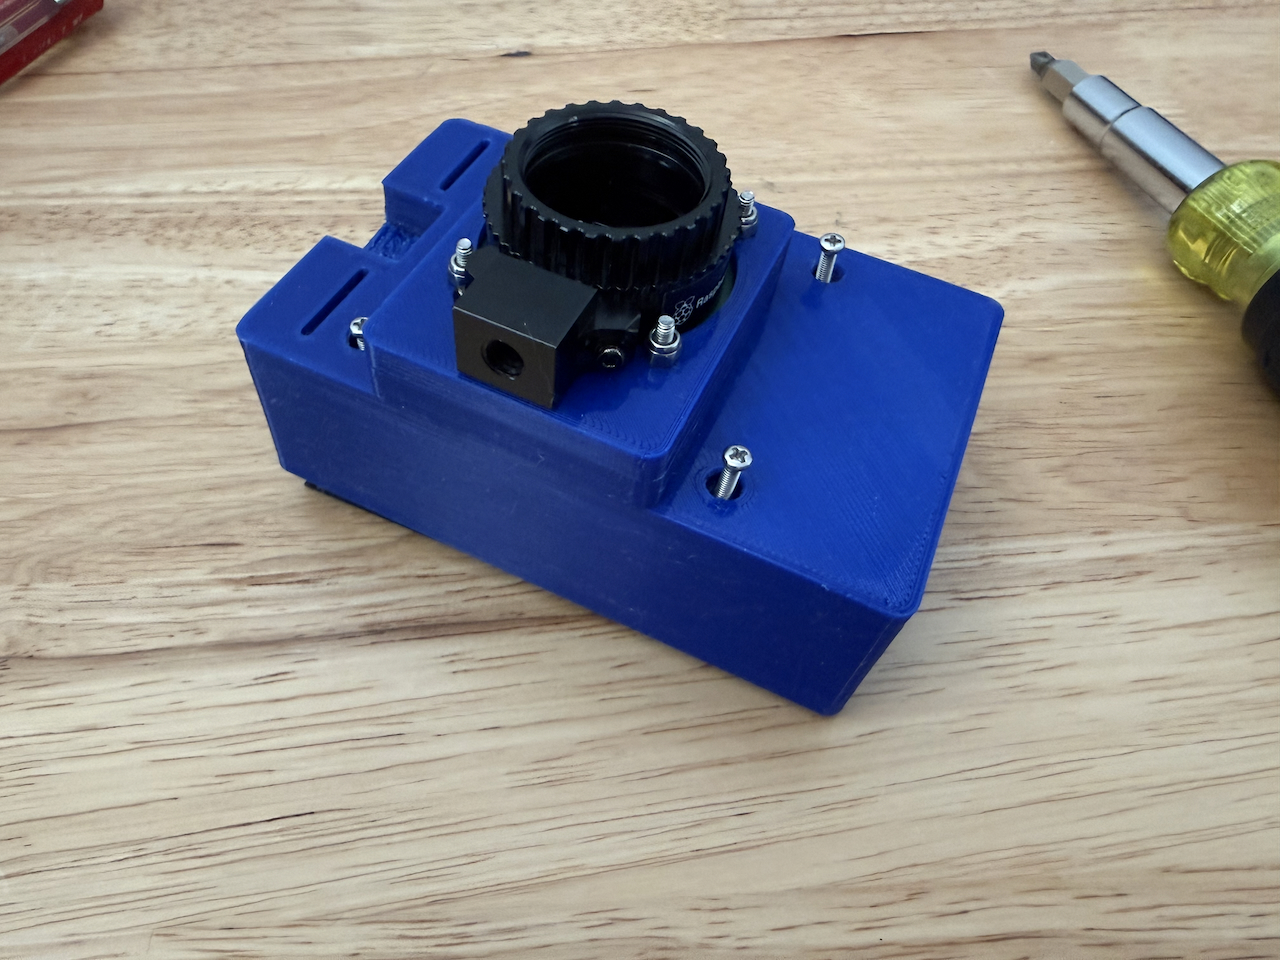
Remember: patience is key here! The screws will gently pull everything into alignment. No pushing on that beautiful screen!
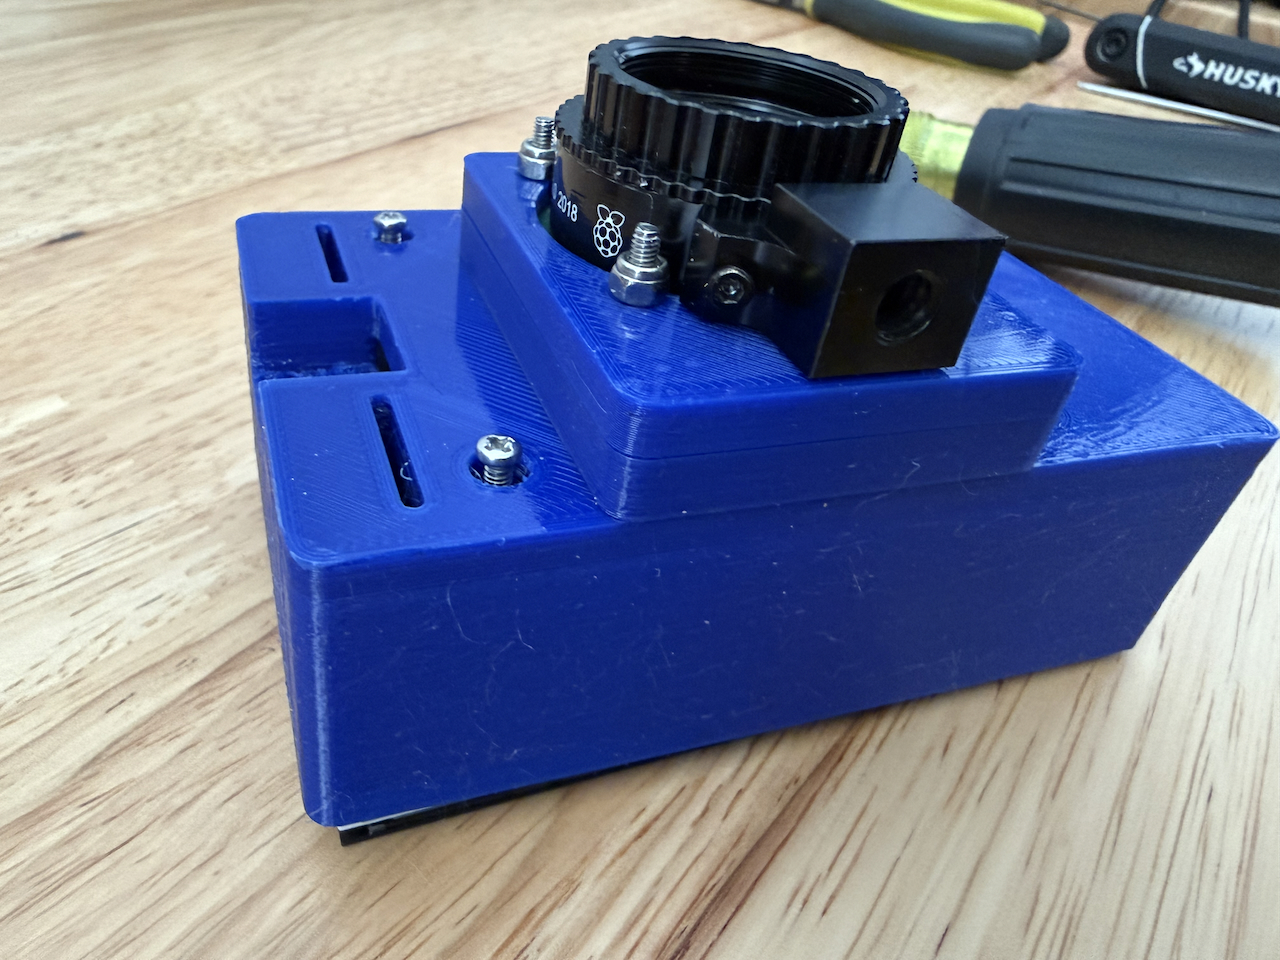
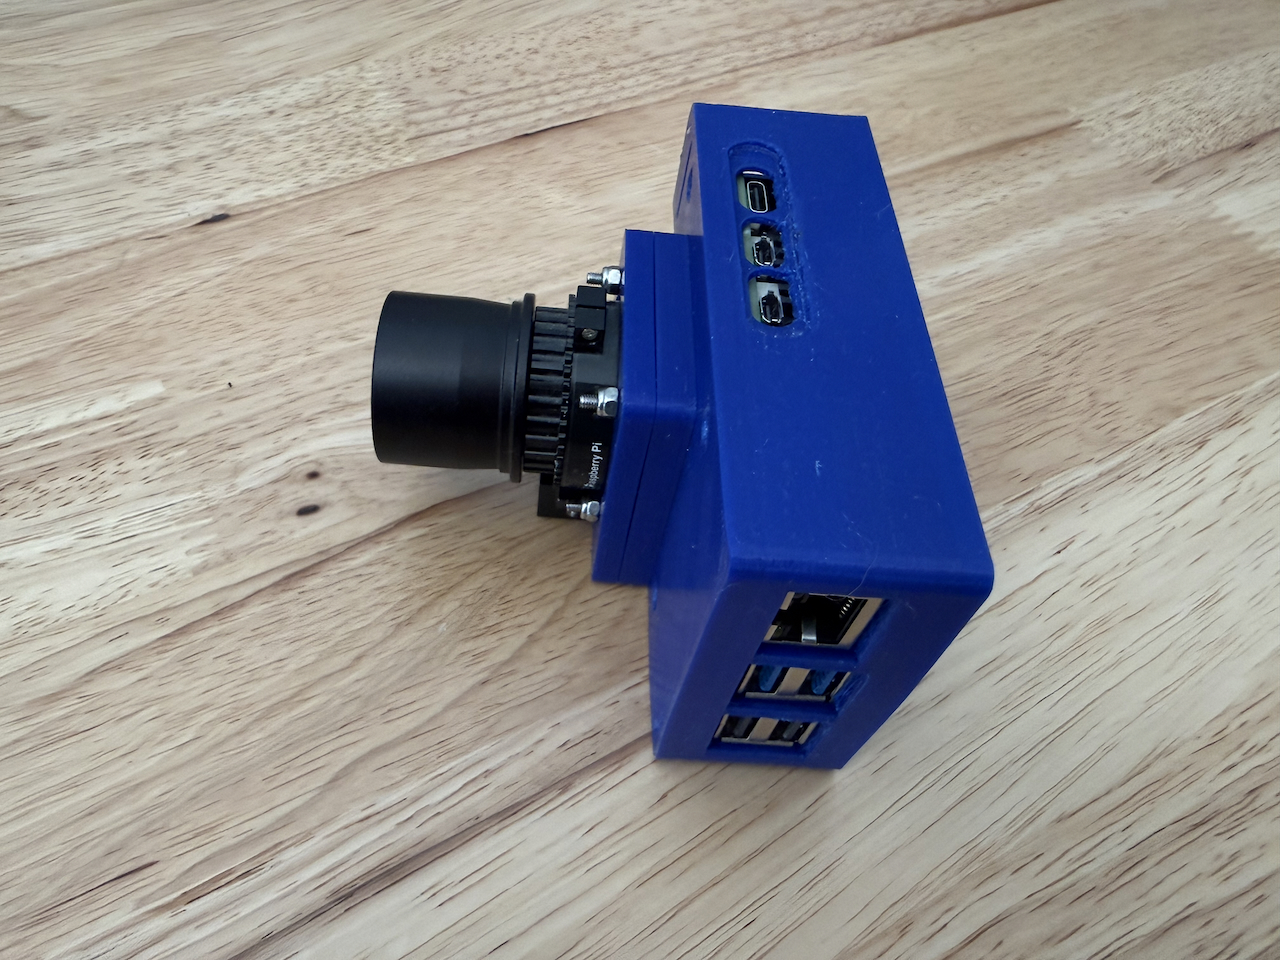
🎊 Assembly Complete! Look at what you've built!
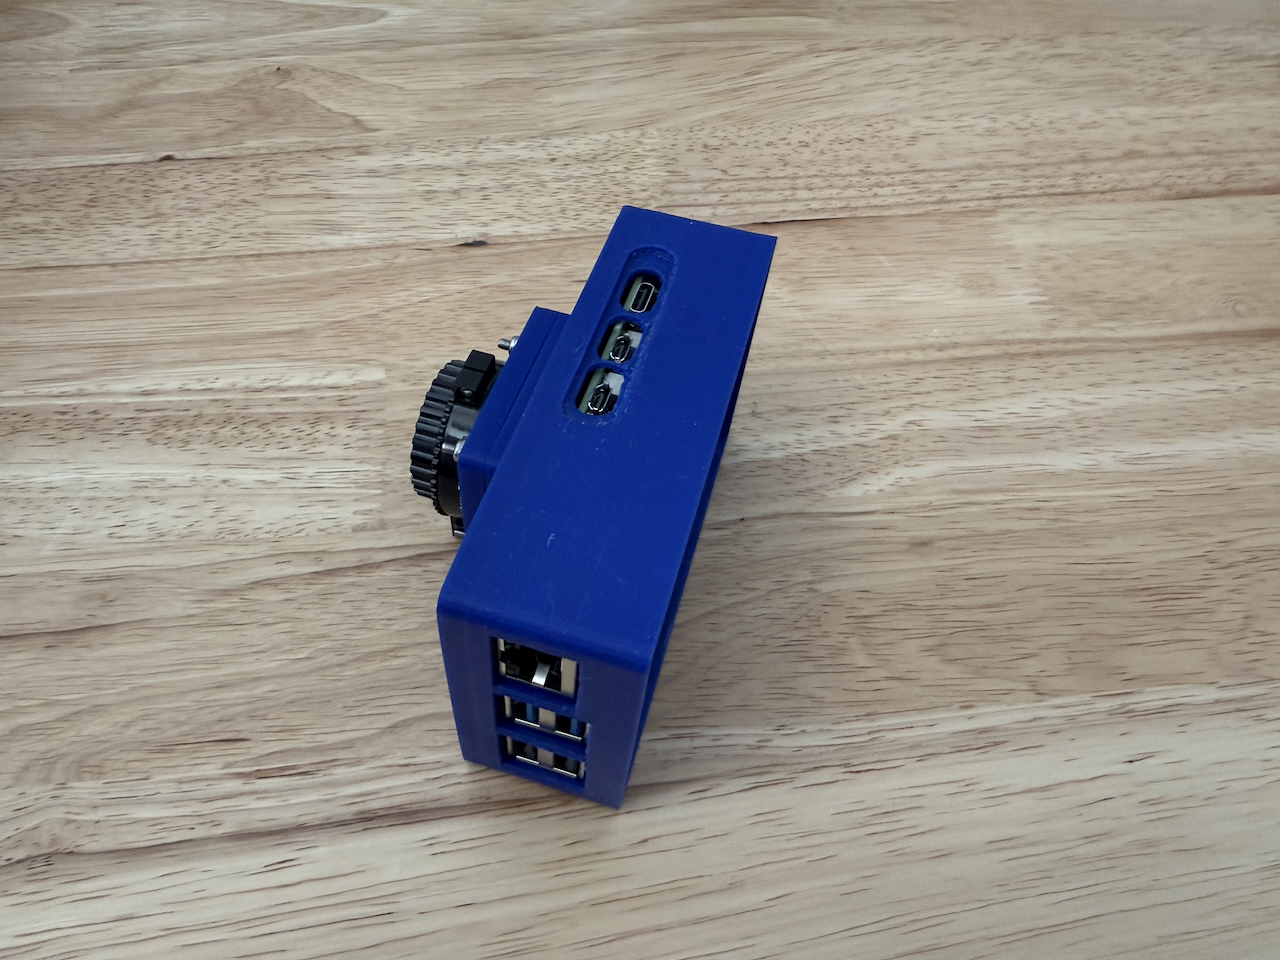
The Finishing Touches
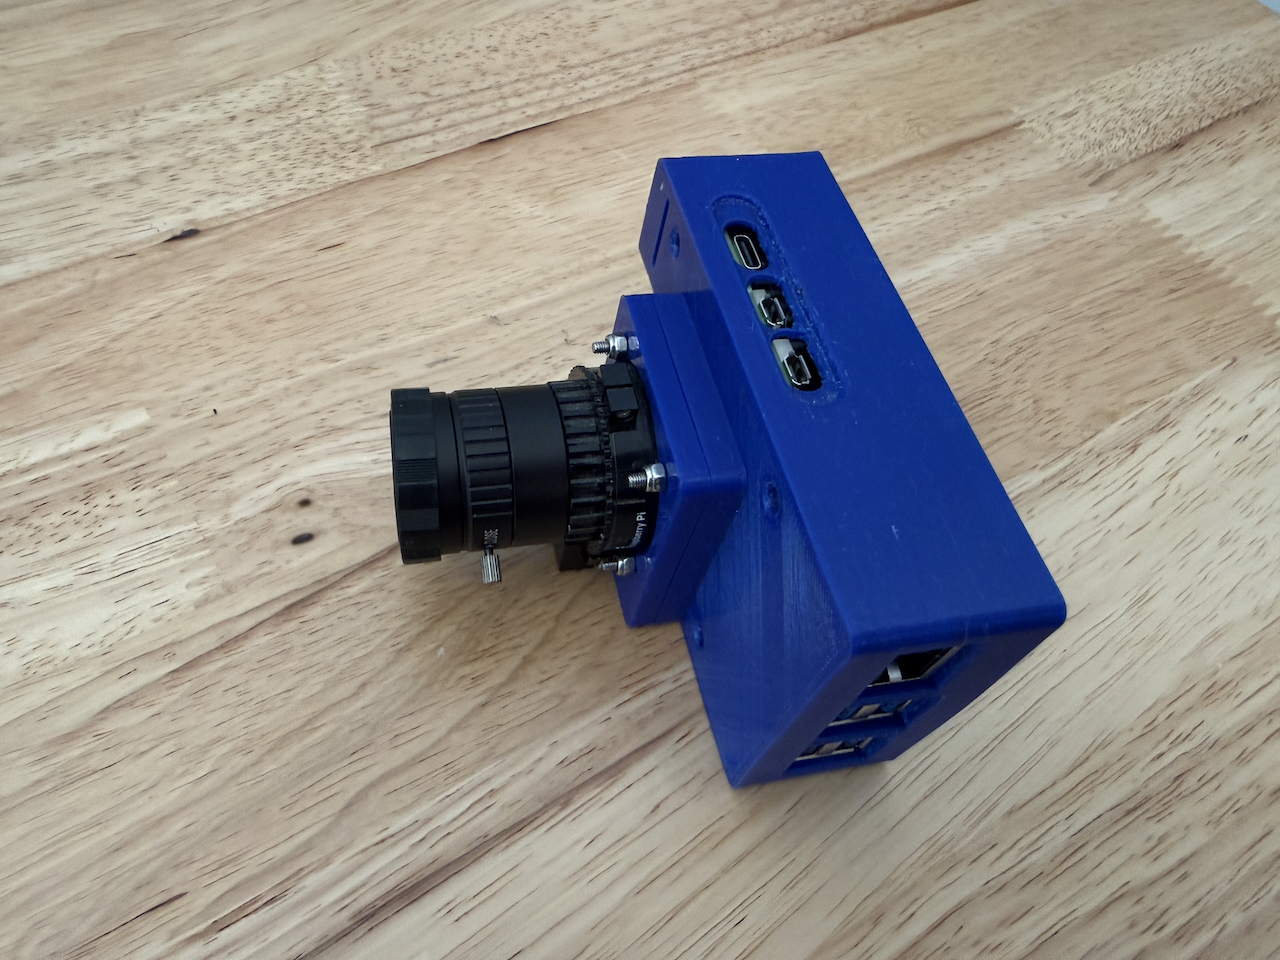
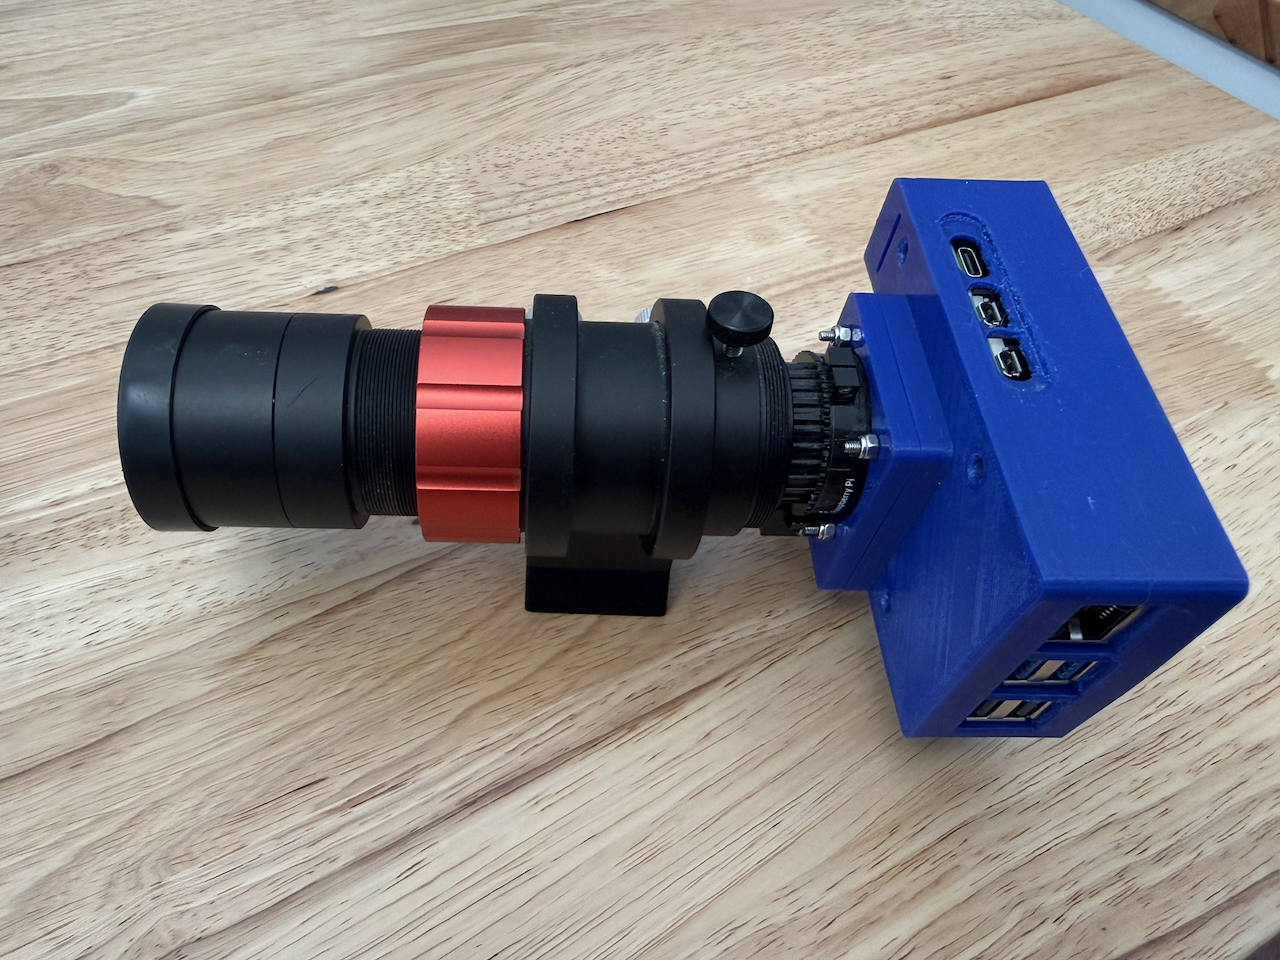
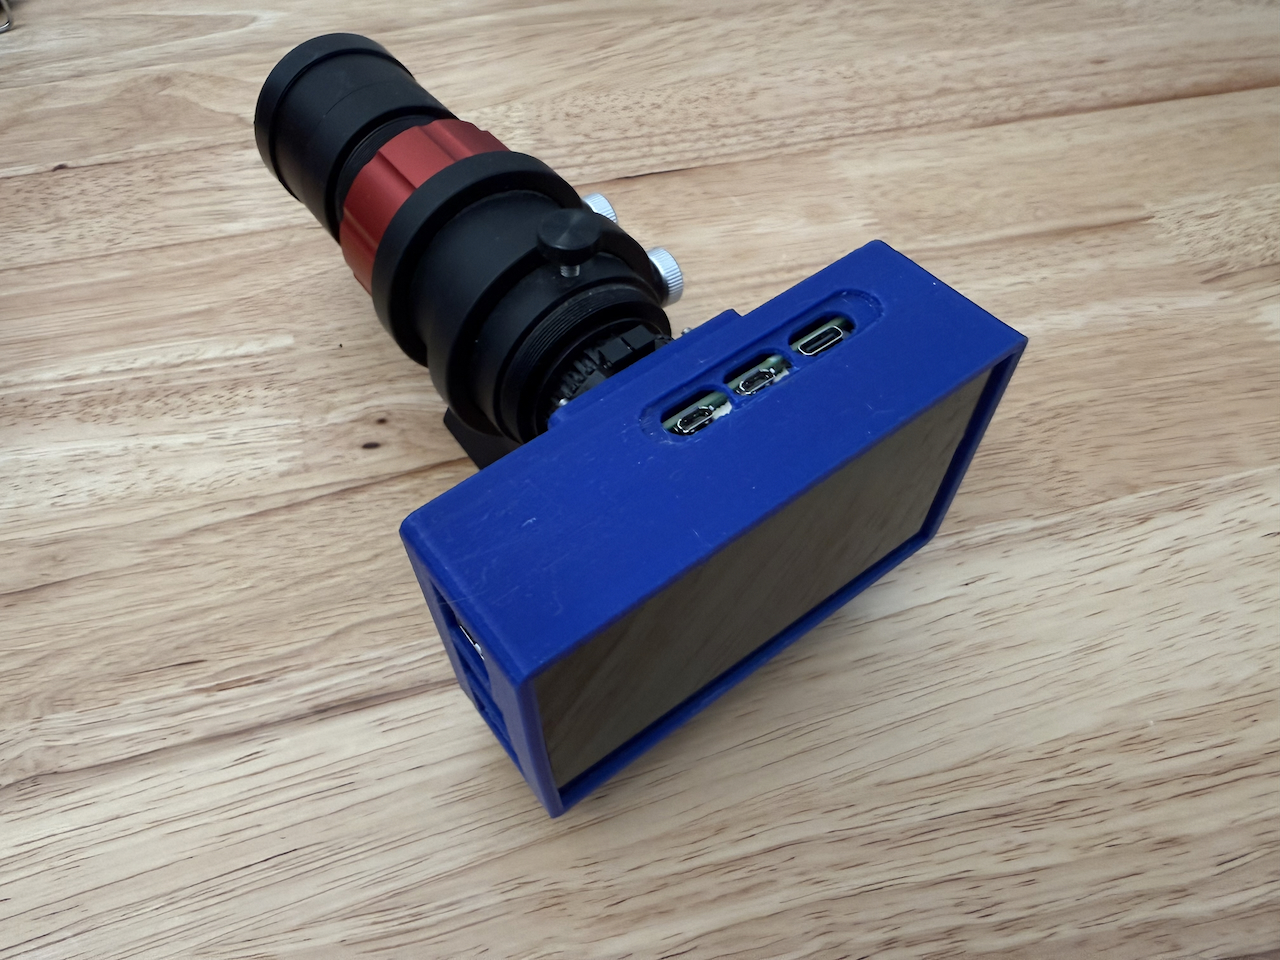
Now for the fun part—adding your optics! You can either:
Attach a lens directly:
Or go with an eyepiece adapter:
Then connect it to your telescope and you're ready to explore the cosmos!
For Developers: Working with the Source Code
Want to modify or customize the design? Great! This project uses gulp to bundle everything into a single dist/PiPiece.jscad file. Here's how it works:
- Run the development server:
npm start - Start a jscad1-server instance (JSCAD v1 isn't available online anymore, but you can install a local server via NPM)
- Drag the generated
dist/PiPiece.jscadfile into the jscad1-server window - Enable
Auto Reloadin OpenJSCAD - Save your changes and gulp regenerates the file—your model updates automatically!
Pretty cool, right? 😊
Other Useful Commands
Clean build: Run npm run clean to delete the dist directory and start fresh.
Inject dependencies: Run npm run inject to manually combine source files and bundle in dependent libraries.
Building the Documentation Site
Want to create that fancy interactive documentation site? Run npm run build to generate a vuepress static site that combines this README with a live vue-openjscad viewer.
Note: The base URL defaults to /PiPiece/ but you can customize it with the BASEPATH environment variable. When you push to GitLab, the CI/CD pipeline automatically builds and publishes everything to GitLab Pages.
Tip: Check out the vue-openjscad package documentation if you want to tweak settings like the grid display or camera angles.
Live Development Preview
Run npm run serve to start vuepress in development mode. This gives you:
- Live preview of your documentation
- Hot reloading when you edit the README
- Instant feedback on your changes
Note: Changes to the 3D model itself won't auto-reload—you'll need to manually refresh your browser for those.
About jscad-utils
This project uses jscad-utils, a super helpful library that makes creating and aligning 3D objects much easier. It's like having power tools instead of hand tools!
If you decide you don't need it (maybe you're a purist!), just:
- Run
npm uninstall --save jscad-utils - Remove the
util.init(CSG);line fromPiPiece.jscad
Adding More Libraries
The JSCAD ecosystem has lots of cool libraries! Search NPM to discover what's available. Installing any JSCAD library with NPM and running gulp will automatically bundle it into your dist/PiPiece.jscad file.
Example: Want to add a Raspberry Pi model to your design? Easy!
- Install the library:
npm install --save jscad-raspberrypi - Use it in your code by returning a combined
BPlusgroup from themain()function:
main() {
  util.init(CSG);

  return RaspberryPi.BPlus().combine();
}

// ********************************************************
// Other jscad libraries are injected here.  Do not remove.
// Install jscad libraries using NPM
// ********************************************************
// include:js
// endinject
Sharing Your Design Online
Want to share your customized design with others? There are a few easy options:
Using GitHub Gist
The quickest way to share:
- Upload your
dist/PiPiece.jscadfile to a new GitHub gist - Get the raw file URL
- Create a shareable link:
http://openjscad.org/#+ your raw gist URL
Using GitLab Snippet
Prefer GitLab? Works the same way:
- Save your file as a public snippet on GitLab
- Create a link:
https://openjscad.org/#https://gitlab.com/snippets/YOUR_SNIPPET_ID/raw.jscad
Example: https://openjscad.org/#https://gitlab.com/snippets/1795323/raw.jscad
Note: Replace the snippet ID with yours, and don't forget to add .jscad at the end!
License
ISC © John Cole